Squid is a caching and forwarding web proxy server for Linux-based operating systems.
It supports HTTP, HTTPS and FTP protocols and is used to improve the web server performance by caching repeated requests. It is also used for controlling internet access and secure your network from unknown traffic.
Generally, a proxy server is placed between the client and the internet. All requests from the client machine are routed through a proxy server.
Features
Squid has the following main features:
- Speed up web server performance.
- Share internet connection on the local network.
- Filter the internet traffic based on rules.
- Hide your real IP address.
In this tutorial, we will show you how to set up a proxy server with Squid on Debian 10.
Requirements
In order to follow this tutorial you will need:
- A system running Debian 10.
- A Desktop system with Firefox installed.
Ok, so let's begin!
Install Squid Proxy
By default, the Squid package is included in the Debian 10 default repository. You can install it by just running the following command:
# apt-get install squid -y
Once the Squid has been installed, start the Squid service and enable it to start at system reboot:
# systemctl start squid
# systemctl enable squid
You can verfiy the status of the Squid with the following command:
# systemctl status squid
You should get the following output:
● squid.service - Squid Web Proxy Server
   Loaded: loaded (/lib/systemd/system/squid.service; enabled; vendor preset: enabled)
   Active: active (running) since Wed 2021-01-20 05:05:54 UTC; 40s ago
     Docs: man:squid(8)
 Main PID: 1343 (squid)
    Tasks: 4 (limit: 2359)
   Memory: 16.1M
   CGroup: /system.slice/squid.service
           ├─1343 /usr/sbin/squid -sYC
           ├─1345 (squid-1) --kid squid-1 -sYC
           ├─1346 (logfile-daemon) /var/log/squid/access.log
           └─1362 (pinger)

Jan 20 05:05:54 debian10 squid[1345]: Using Least Load store dir selection
Jan 20 05:05:54 debian10 squid[1345]: Set Current Directory to /var/spool/squid
Jan 20 05:05:54 debian10 squid[1345]: Finished loading MIME types and icons.
Jan 20 05:05:54 debian10 systemd[1]: /lib/systemd/system/squid.service:7: PIDFile= references path below legacy directory /var/run/, updating /
Jan 20 05:05:54 debian10 squid[1345]: HTCP Disabled.
Jan 20 05:05:54 debian10 squid[1345]: Pinger socket opened on FD 14
Jan 20 05:05:54 debian10 squid[1345]: Squid plugin modules loaded: 0
Jan 20 05:05:54 debian10 squid[1345]: Adaptation support is off.
Jan 20 05:05:54 debian10 squid[1345]: Accepting HTTP Socket connections at local=[::]:3128 remote=[::] FD 12 flags=9
Jan 20 05:05:55 debian10 squid[1345]: storeLateRelease: released 0 objects
Change Squid Default Port
By default, Squid listens on port 3128. You can verify it with the following command:
# ss -antpl | grep 3128
You should see the following output:
LISTEN 0 128 *:3128 *:* users: ("squid",pid=1345,fd=12))
You can change the Squid default port by editing /etc/squid/squid.conf file.
# nano /etc/squid/squid.conf
Change the following line with your desired port:
http_port 3128
Save and close the file and then restart the Squid service to apply the changes:
# systemctl restart squid
Warning
Remember that you must open port 3128 in the server firewall
Configure Squid to Allow All Traffic
By default, the Squid proxy server denies all incoming traffic. So you will need to allow all traffic on the proxy server.
To do so, edit the Squid main configuration file:
# nano/etc/squid/squid.conf
Comment the http_access deny all line and add the http_access allow all as shown below:
http_access allow all
#http_access deny all
Save and close the file, then restart the Squid service to apply the changes:
# systemctl restart squid
Block Specific Websites
If you are using the Squid proxy server in your internal network for internet sharing then it is a good idea to block some websites.
You can do it by editing the Squid main configuration file:
nano /etc/squid/squid.conf
Add the following line just above the "allow all rules" to block facebook.com and yahoo.com website:
acl backlist1 dstdomain facebook.com
acl backlist2 dstdomain yahoo.com
http_access deny backlist1
http_access deny backlist2
Save and close the file then restart the Squid service to apply the changes:
# systemctl restart squid
Configure Client Browser to Use Proxy
Next, you will need to configure the Firefox web browser on each client PC to use the Squid proxy server.
Follow the below steps to configure proxy on Firefox web browser:
Step 1 - Open the Firefox web browser. In the upper-right corner, click on the hamburger icon => Preferences. You should see the following screen:
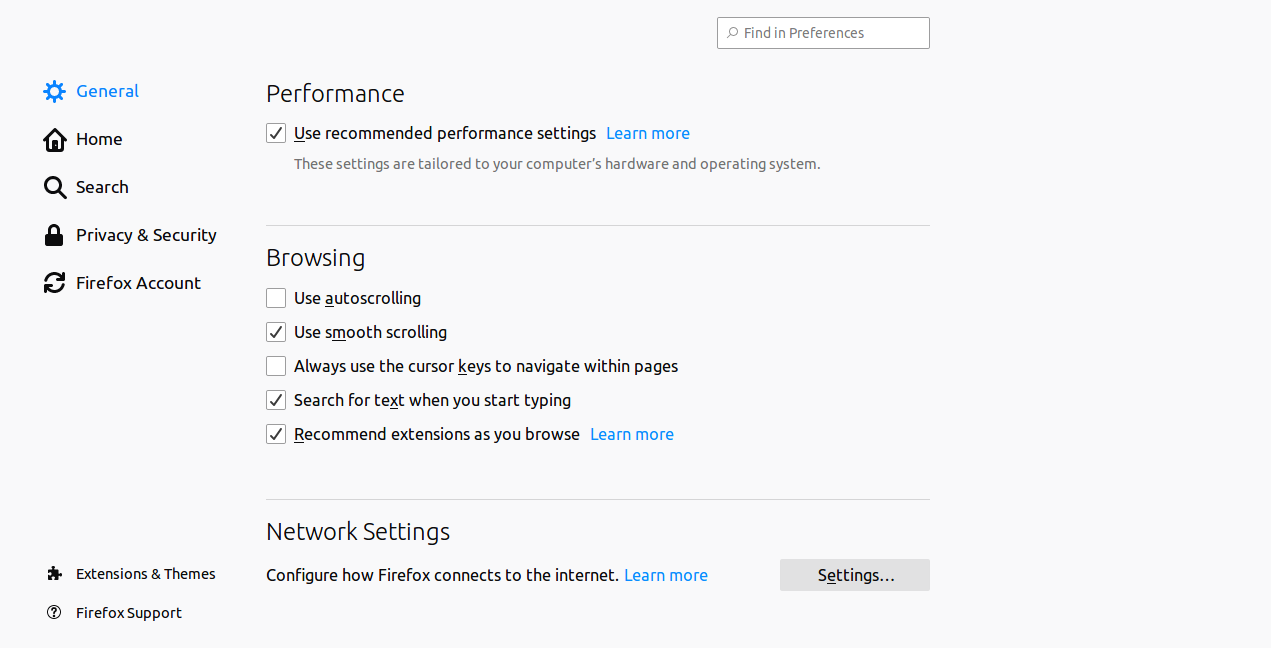
Step 2 - Scroll down to the Network Settings section and click on the Settings. You should see the following screen:
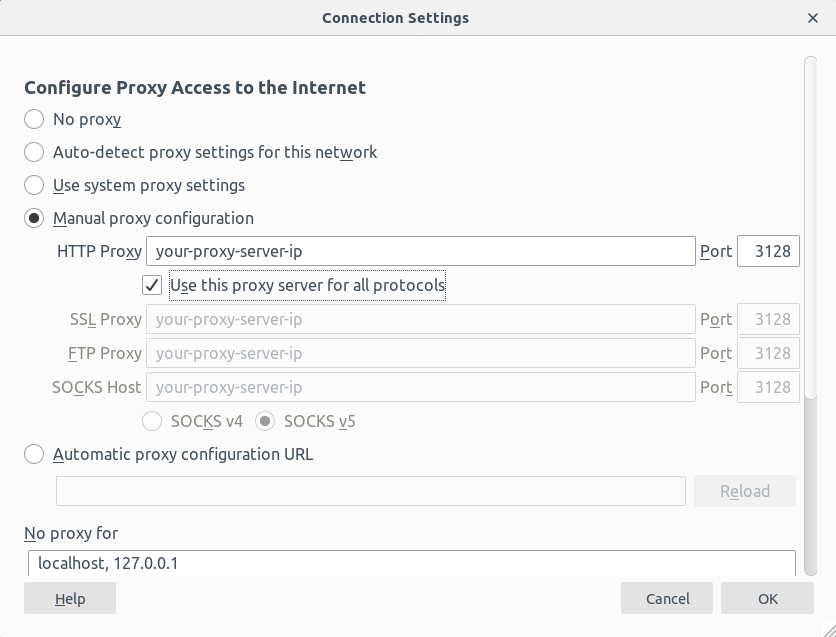
Step 3 - Select "Manual proxy configuration" and provide your proxy server IP and Port. Then, select the "Use this proxy server for all protocols" checkbox and click on the "OK" button to save the settings.
Perform the above steps on all client browsers.
Test Squid Proxy
At this point, your web browser is configured to use the Squid proxy server.
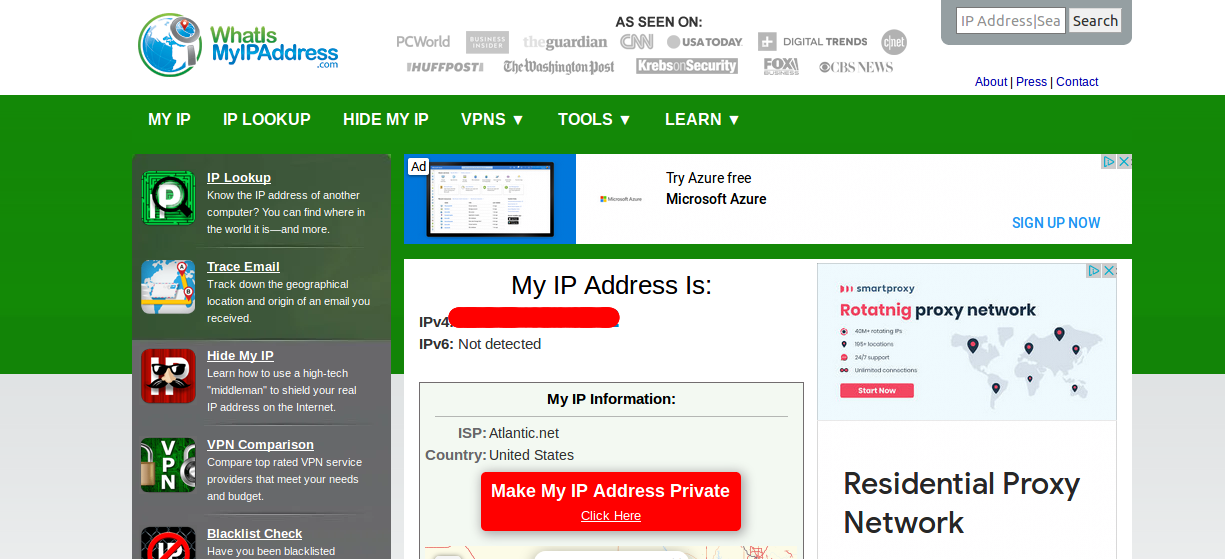
Now, open your web browser and access the URL https://whatismyipaddress.com/. You should see your Proxy server IP address in the following screen:
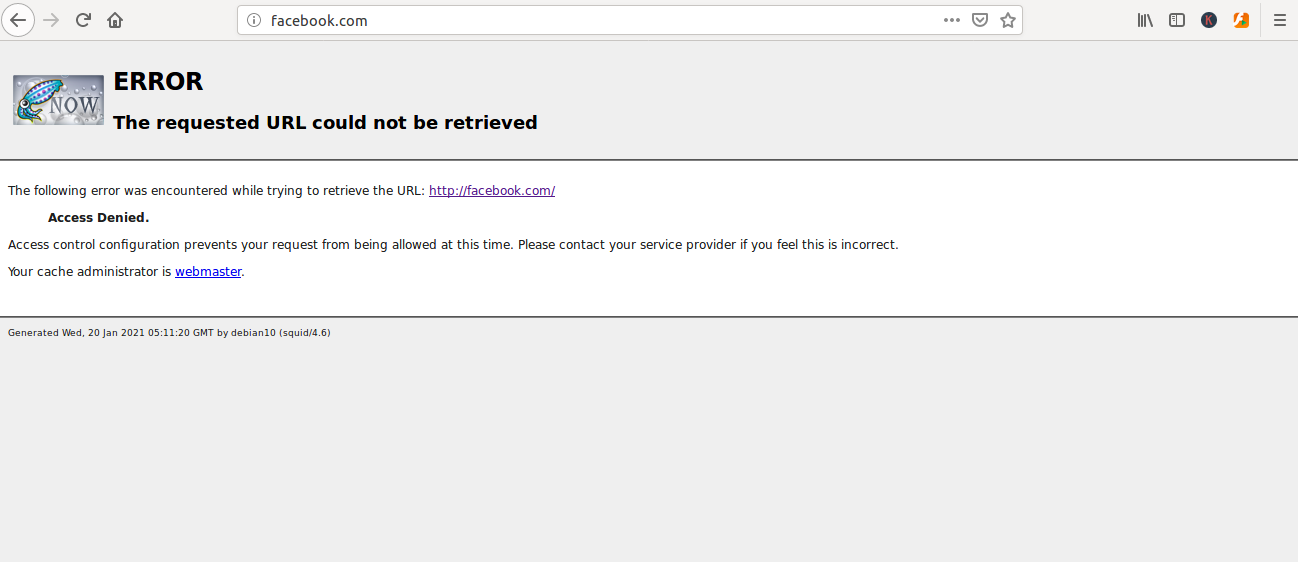
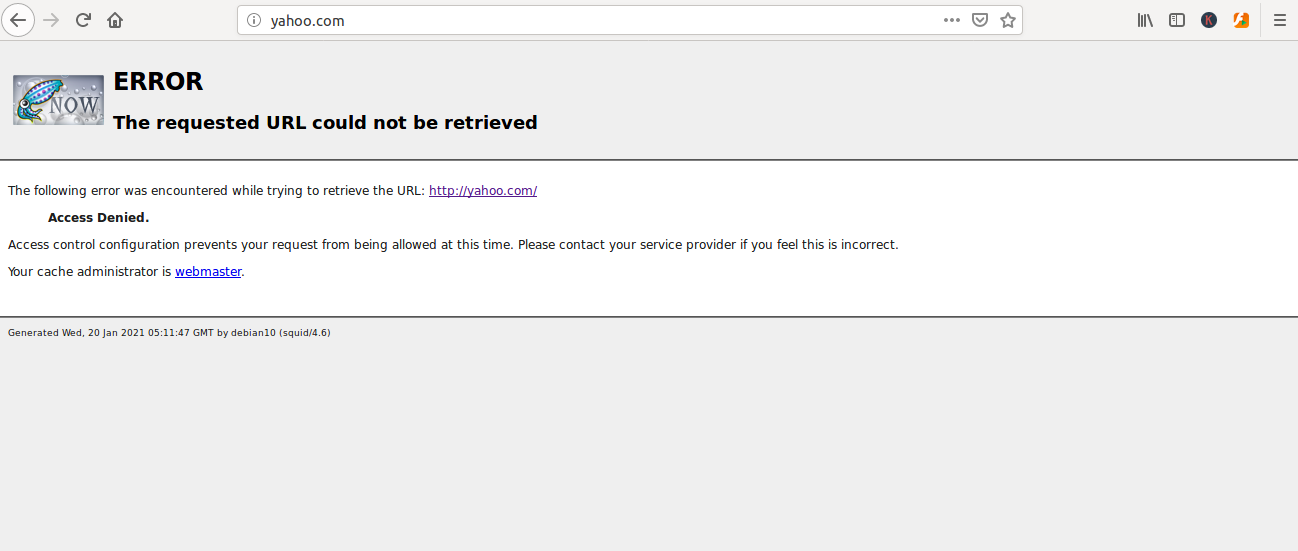
Now, try to access http://facebook.com and http://yahoo.com/ on your web browser. You should get the access denied error as shown below:
Conclusion
In the above guide, you have learned how to set up a Squid proxy server on Debian 10 server.
You have also learned how to block specific website with Squid proxy.
We hope this will helps you to setup a Squid proxy server on your internal network.
If you have any questions, don't hesistate to contact us!