Docker images are essentially a snapshot of a container. Images are created with the build command, which creates a container when initiated with “run”. Once an image is created, it can be stored in the Hub Docker.
In this tutorial, we will explore Docker images with the following approach:
- Administration with images locally on our host.
- Creation of basic images.
- Upload images in Hub Docker.
Requirements
Some distribution of GNU/Linux with Docker installed. If you don’t know how to install Docker on your Linux, here we explain how.
Searching for Docker images
One of the most important features of Docker is that everyone can create images for all kinds of purposes. Some of them are uploaded to Docker Hub, where they will be at our disposal and we can download them. In addition, in Docker Hub we will also find official images in addition to third-party images.
For instance, let’s look for a GitLab image:

As we can see, Docker offers a lot of possibilities. Generally, it is advisable to install official images or high-scored ones.
Download Docker images
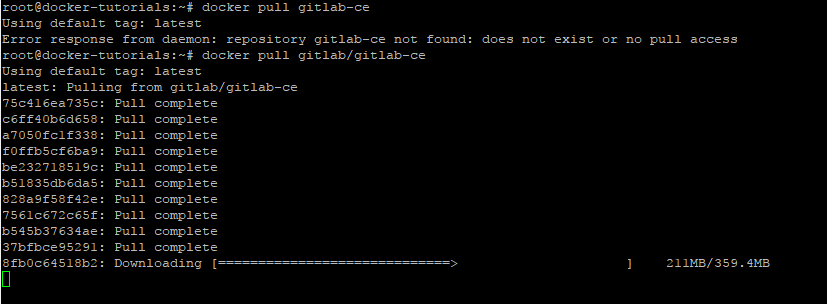
Docker will automatically download any image we ask for. The docker pull command allows you to download the most recent image from that repository. However, you can specify which version of the image we want to download.
For example, if we want to download Ubuntu 15.04, we can do it with:
# docker pull ubuntu:15.04
If, otherwise, we want to download the latest version in the repository, we just have to type:
# docker pull gitlab/gitlab-ce

Listing images
To obtain a list of all the images available to mount in a container, that is, the images that we have downloaded, we must execute the following:
# docker images
To obtain a list of all the images available to mount in a container, that is, the images that we have downloaded, we must execute the following.
Update and creation of images
If we want to make changes in a particular image, what we have to do is create a container of the image:
# docker run -t -i ubuntu /bin/bash
As we can see, the prompt will have been modified by the container ID: see that the prompt will have been modified by the container ID:

Next, we will install several packages to create an image:
# apt install wget nano apache2
Once the installation of these packages is finished, we will exit the container with the exit command.
What we have now is a container based on the Ubuntu instance modified by us. Now we will create a copy of this container to an image with the apache-ubuntu name. To do that, first we have to look for the ID container:
# docker ps -a

Once the ID has been obtained, we create a new image with the apache-ubuntu name executing the following command:
# docker commit [ID_container] apache-ubuntu

To verify that our image has been successfully created:
# docker images

Remove images
To delete an image, for example the one we created in the previous section, we just have to execute this command:
# docker image rm apache-ubuntu

Create an image with a DockFile
You can generate images from Dockerfiles, some files that we will create manually and that will contain a sequence of instructions that by means of a base image it allows to create others.
To create a Dockerfile we need a text editor and to know in advance the syntax of the commands and then build it.
We will create a file called Dockerfile (without any extension):
# touch Dockerfile
And we will add the following:
FROM ubuntu
MAINTAINER cloudingtutos <soporte@clouding.io>
ENV HOME /root
RUN apt-get update
RUN apt-get install -y apache2 wget
EXPOSE 80
CMD service apache2 start
Once created, what we are going to do is make a build of the base image with our docker file:
# docker build -t ubunpache .
The structure of this command is: docker build -t [NombreDeLaImagen] /path/directorioDelDockFile/
And if we show the list of our images:

Post image in Docker Hub
Docker Hub is a repository where you can keep Docker images publicly or privately. This way we can save the images that we have created. Docker Hub provides many features such as a repository for Docker images, user authentication, automated image compilations, integration with GitHub and group management.
To work with Docker Hub, you will need to create an account at this link. After verifying the e-mail address, your registration will be completed. Now we can start publishing images in our repository.

Before uploading an image to Docker Hub, it is important that you get a label. To do this we must first identify the ID of the image:
# docker tag e6df1a72e3e5 cloudingtutos/apache-instance:ubuntu
Once labeled, we have to do a push:
# docker push cloudingtutos/apache-instance:ubuntu

And if we access via web, we can see that we have an image:
