In the WireGuard preinstalled Image, WireGuard-UI is installed and configured. So, you can directly access with the link provided in the server information from any Web browser to the UI panel.
First, you'll be prompted to enter your credentials. Once you've logged in with the specified user, redirect to the WireGuard Server section and the following configuration should show up:

No need to change it, but Server Interface Addresses would be for the VPN address(es) of the server. In this case, leave the default (10.0.8.1/24). It is essential to open the port for the VPN connection in the Firewall profile assigned in the WireGuard server, the port will correspond to Listen Port and by default it is port 51820 UDP.
Also, the following scripts should appear by default:
PostUp Script:
iptables -A FORWARD -i %i -j ACCEPT; iptables -t nat -A POSTROUTING -o eth0 -j MASQUERADEPostDown Script:
iptables -D FORWARD -i %i -j ACCEPT; iptables -t nat -D POSTROUTING -o eth0 -j MASQUERADEAlthough it's not necessary to make any changes, in the pre-installed image is configured correctly for the use of the platform connection.
Eventually, click Save if you've made any required or custom changes. Then, at the top right Apply Config to write the changes and restart the WireGuard service.

Remember to add the VPN connection path on the servers you want to access, for instance on Windows you would run the following command from a CMD with administrator permissions (remember to modify 10.20.10.X to the internal IP of the Wireguard server):
# route -p add 10.0.8.0 mask 255.255.255.0 10.20.10.X
Create WireGuard client
After reviewing the configuration, click on WireGuard Client and then click on New Client:

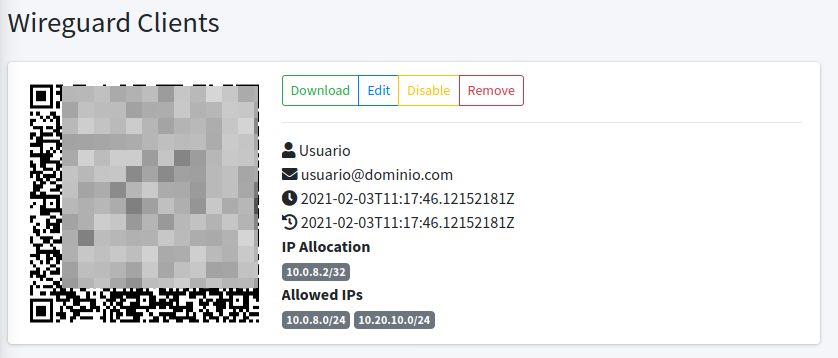
In the Allowed IPs section you'll have to add the two routes 10.0.8.0/24 (the VPN network) and 10.20.10.0/24 (the private network), once it's done, to execute the changes click on Apply Config at the top right. After creating the user you'll have the option to read the QR Code to set up the device or download the configuration file to import it to the WireGuard Client.

Remember to re-apply Apply Config to implement the created client in the WireGuard UI:

The Wireguard client can be downloaded from the official website, click here to go to it. Install it on the desired device, add the client settings created and click activate.
If you have any questions about this or any other issue related to your Clouding servers, don't hesitate to write to support. We are at your side for whatever you need!