In a Windows Server installation, remote sound is disabled by default, both for audio input and output. Therefore, to be able to play or send sound from the remote desktop client, you will need to enable it on the RDP server and on the client itself.
In this article, we will show you step by step how to do it and an alternative to Microsoft's audio input (because it requires installing and configuring Remote Desktop roles).
Remote Audio Playback
To play audio only, go to the Control Panel, then click on Administrative Tools and double-click Services. There, look for Windows Audio, right-click on it to open the dropdown menu, and then click on Properties. A new window will open (see inserted image) where you should set the startup type to automatic and then click start to activate it. It is also necessary to set the startup type to automatic for the Windows Audio Endpoint Builder service.
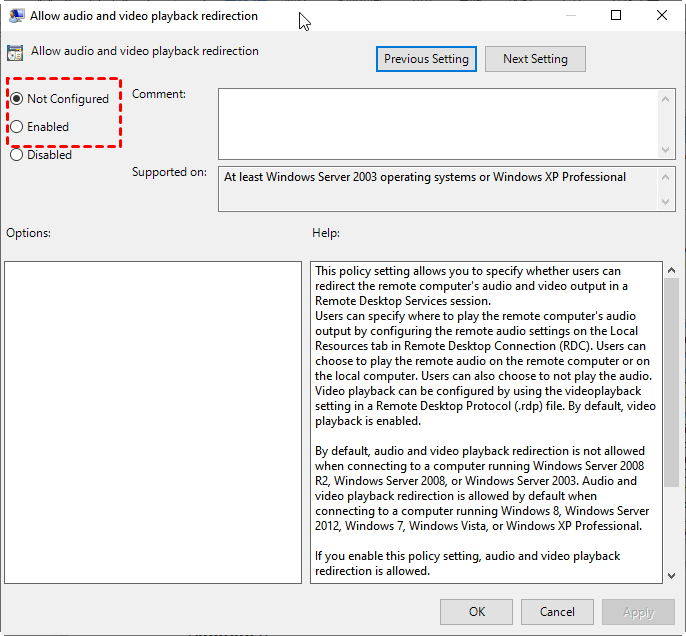
Next, open the Local Group Policy Editor (gpedit.msc), navigate to Computer Configuration, go to Administrative Templates, then Windows Components, Remote Desktop Services, and Remote Desktop Session Host. In the Device and Resource Redirection section, double-click Allow audio and video playback redirection or right-click and select "Edit" to set the state to Enabled:
Once the service is started, the Remote Audio output should be available:
Now you should be able to play audio from the remote desktop server, provided that redirection is enabled in the RDP client under Local Resources ("Show options"):
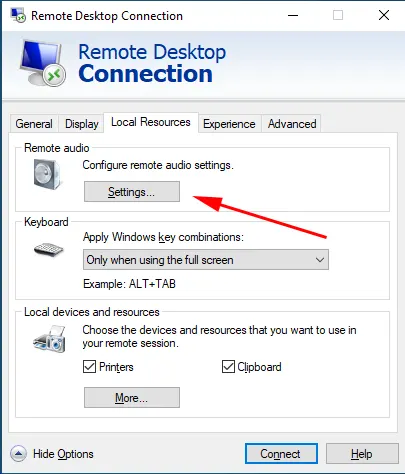
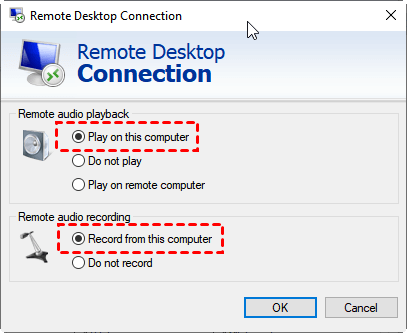
Remember that the playback option should be set to "Play on this computer" to use the speakers configured on your machine.
Remote Audio Input
For remote audio input, Microsoft does not provide any remote audio input device by default during the Windows Server installation. The activation is only possible through the installation and configuration of Remote Desktop roles (specifically the Remote Desktop Session Host feature). Therefore, a Remote Desktop license will be required after the 120-day trial period provided by Microsoft.
If you do not wish to purchase a license or use the trial version, skip to the alternative audio input section, and to install Remote Desktop roles with a license, you can follow the article How to Install Remote Desktop Licenses.
Once the Remote Desktop Session Host feature is installed, the Remote Audio microphone will appear, but it will be necessary to enable redirection by configuring it from the Local Group Policy Editor (gpedit.msc). Navigate to Computer Configuration, access Administrative Templates, then Windows Components, Remote Desktop Services, and Remote Desktop Session Host. Under Device and Resource Redirection, double-click Allow audio recording redirection or right-click "Edit" to set it to Enabled.
Additionally, in Privacy, it will be necessary to allow microphone usage for applications:
Once configured, and with the "Record from this computer" option enabled in the remote desktop client under the Local Resources tab, you will be able to use the microphone configured on your computer.
Alternative Audio Input
There are different options for installing a virtual audio input device, such as those developed by Eugene Muzychenko or VB AUDIO. These can be used to configure audio input redirection as an alternative to Windows' built-in features. However, the decision to use any of these options must be made by the end user, as they are third-party software solutions.
We hope this guide has been helpful 🙂. Remember, if you have any questions regarding this or any other issue related to your servers in Clouding, do not hesitate to contact us at soporte@clouding.io. We are here to help you!