In our list of images available in Clouding you have available one with cPanel control panel to manage website pages and your server.
Amongst the cPanel features, it's worth highlighting the option to manage web spaces, choose between different versions of PHP, FTP, DNS, mail server, databases, local and remote backups. Also, it has Apache setting and additionally LiteSpeed can be installed, which makes webs go much faster. It also includes the option to add free SSL certificates thanks to Let's Encrypt in an automated way or the possibility to install CloudLinux.
When you create a new server with cPanel, you have to bear in mind that the server is created almost instantaneously but then it'll take around 15 minutes to install all its components, so when you receive the e-mail with the server password, the panel will not be accessible from the browser yet.
After a few minutes of installation, you'll be able to access your cPanel from a browser through the server IP together with port 2087 or 2083.
It's important that the steps below are taken after installing cPanel in order to avoid problems in the future.
Change e-mail Admin account
The first time you access WHM, you're asked to activate a license and create a cPanel account. However, you might want to receive notifications from the server in another account.
In order to change the e-mail, go to "Basic WebHost Manager Setup" and in the "Contact Information" tab, insert the desired e-mail account:

Next, click on "Save Changes".
Change server Hostname
You'll also have to change the server hostname. This will avoid SPAM problems, since the default server name doesn't exist and if e-mails are sent with that hostname, will surely be detected as SPAM.
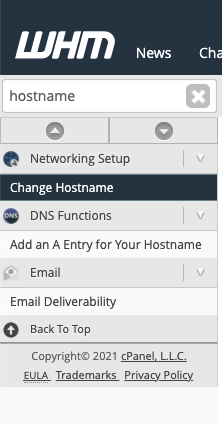
In the search bar on the left side menu, type "Hostname" and click on "Change Hostname":
You can see that there's a Hostname such as "295850ec-fec1-46fd-8292-bd1245ea49ff.clouding.host" and you'll have to replace it by your domain. In this example, Clouding's domain will be used:
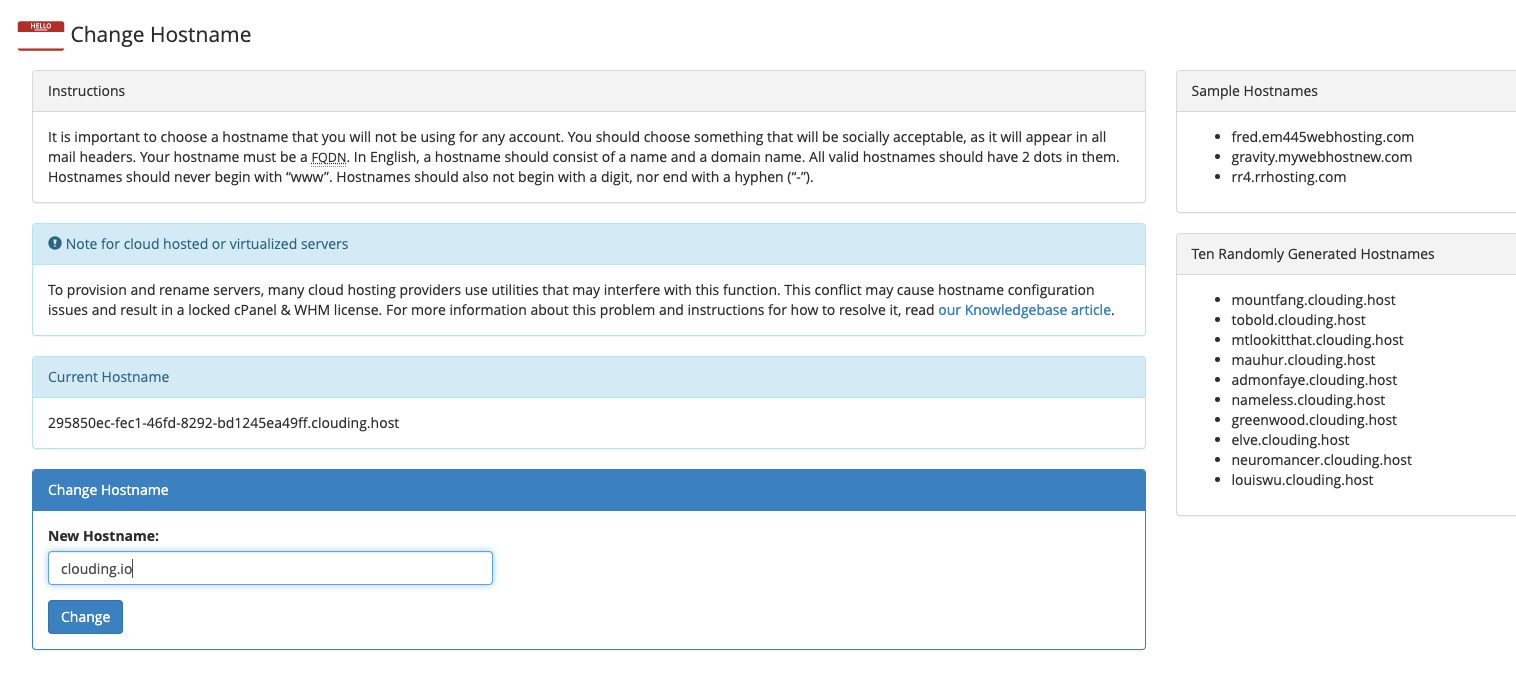
Click on "Change" and therefore you'll have a valid name.
PTR Record
It's important that the PTR record is the same as the server Hostname. This will also avoid SPAM problems. The change can be made in the control panel, in the "DNS" tab >PTR Records
Backups Setting
Another important thing that must be set up are Backups. If you create a server with cPanel with 5GB SSD disc space, it's very likely that with the backups that will automatically generate, the disc will end up full, wich will generate problems to log in and other inconveniences.
If you want to deactivate the backups, you have to uncheck the "Enable Backups" tab in the "Backup Settings" section. You can also do the setting to automate a remote backup throughout Amazon S3, BackBlaze, Google Drive, FTP, SFTP, amongst other options:

Create the first account to add domains
In the main dashboard, to access WHM, click on "Create New Account". Fill in the data and click on "Create".
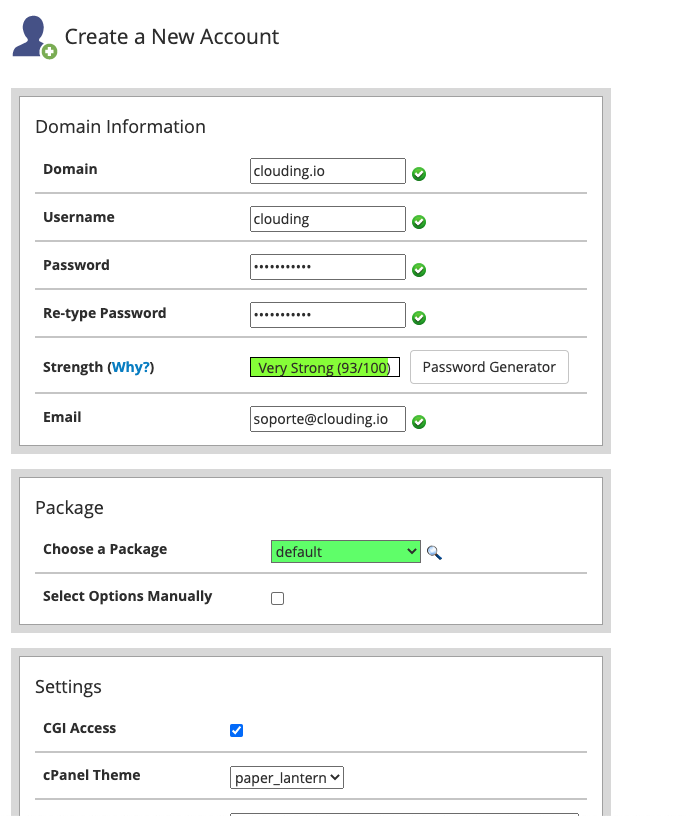
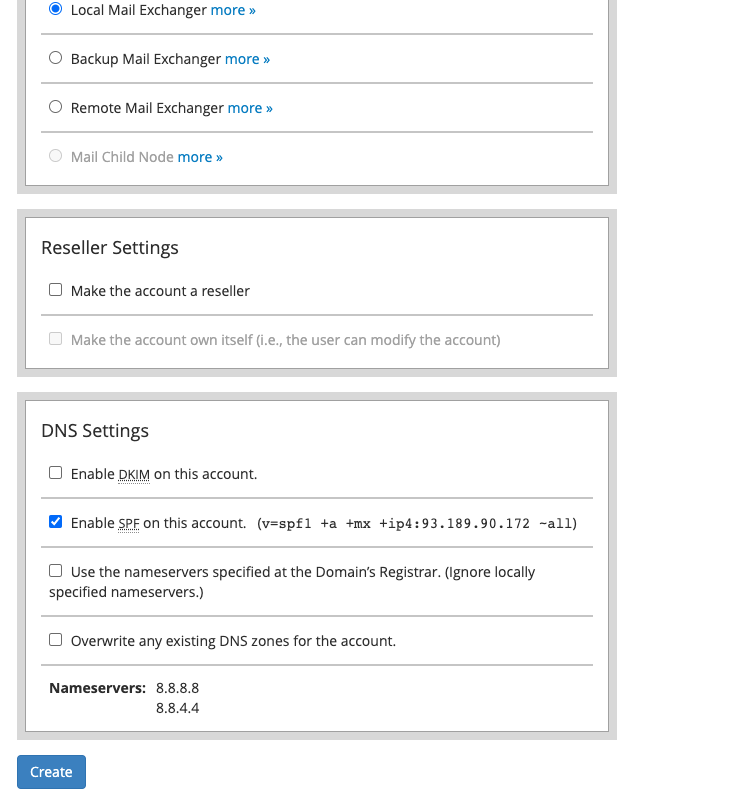
You'll have to see a result similar to the one below:

Install additional PHP versions
By default, when your create a VPS with the cPanel preinstalled image, it has the 7.3, 7.4 y 8.0 PHP versions installed, but if you need the 7.2 version, you'll have to install it by yourself. In orde to do that, from WHM, in the search bar, type "EasyApache" and click on "EasyApache 4".
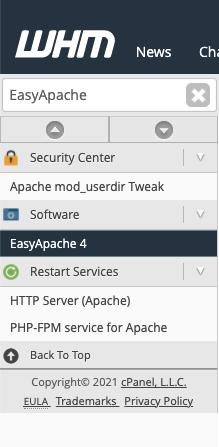
After that, click on "Customize" in the "Currently Installed Packages" tab.

In "PHP Versions", enable the 7.2 version. In the same section, you can install the extensions and additional modes that you need.
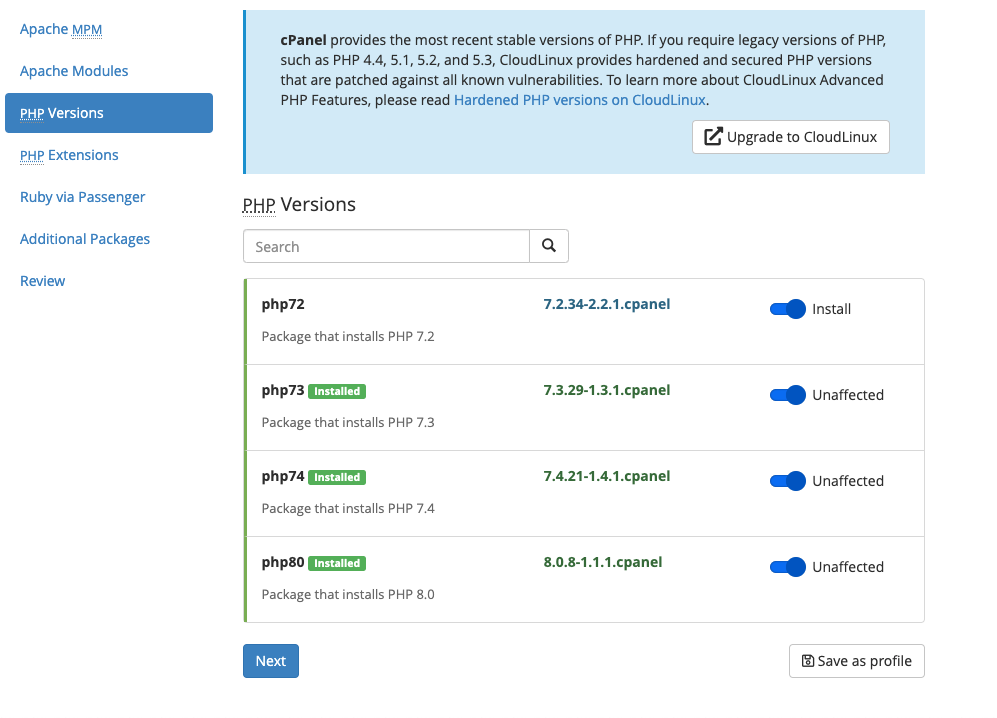
Follow the steps and you'll get the PHP 7.2 version installed.
PHP previous versions
If you need a previous PHP version, you'll have to install the CloudLinux extension and hire the appropriate license.